Isometric Side by Side
Step by Step Guide
This guide explains how to upload, view, and use digital isometric drawings in side-by-side mode with the 3D viewer for inspection and review workflows.
1. Upload Digital Isometrics from the Viewer
Open the component in the 3D viewer.
Click Upload in the viewer toolbar.
Select the isometric drawing files.
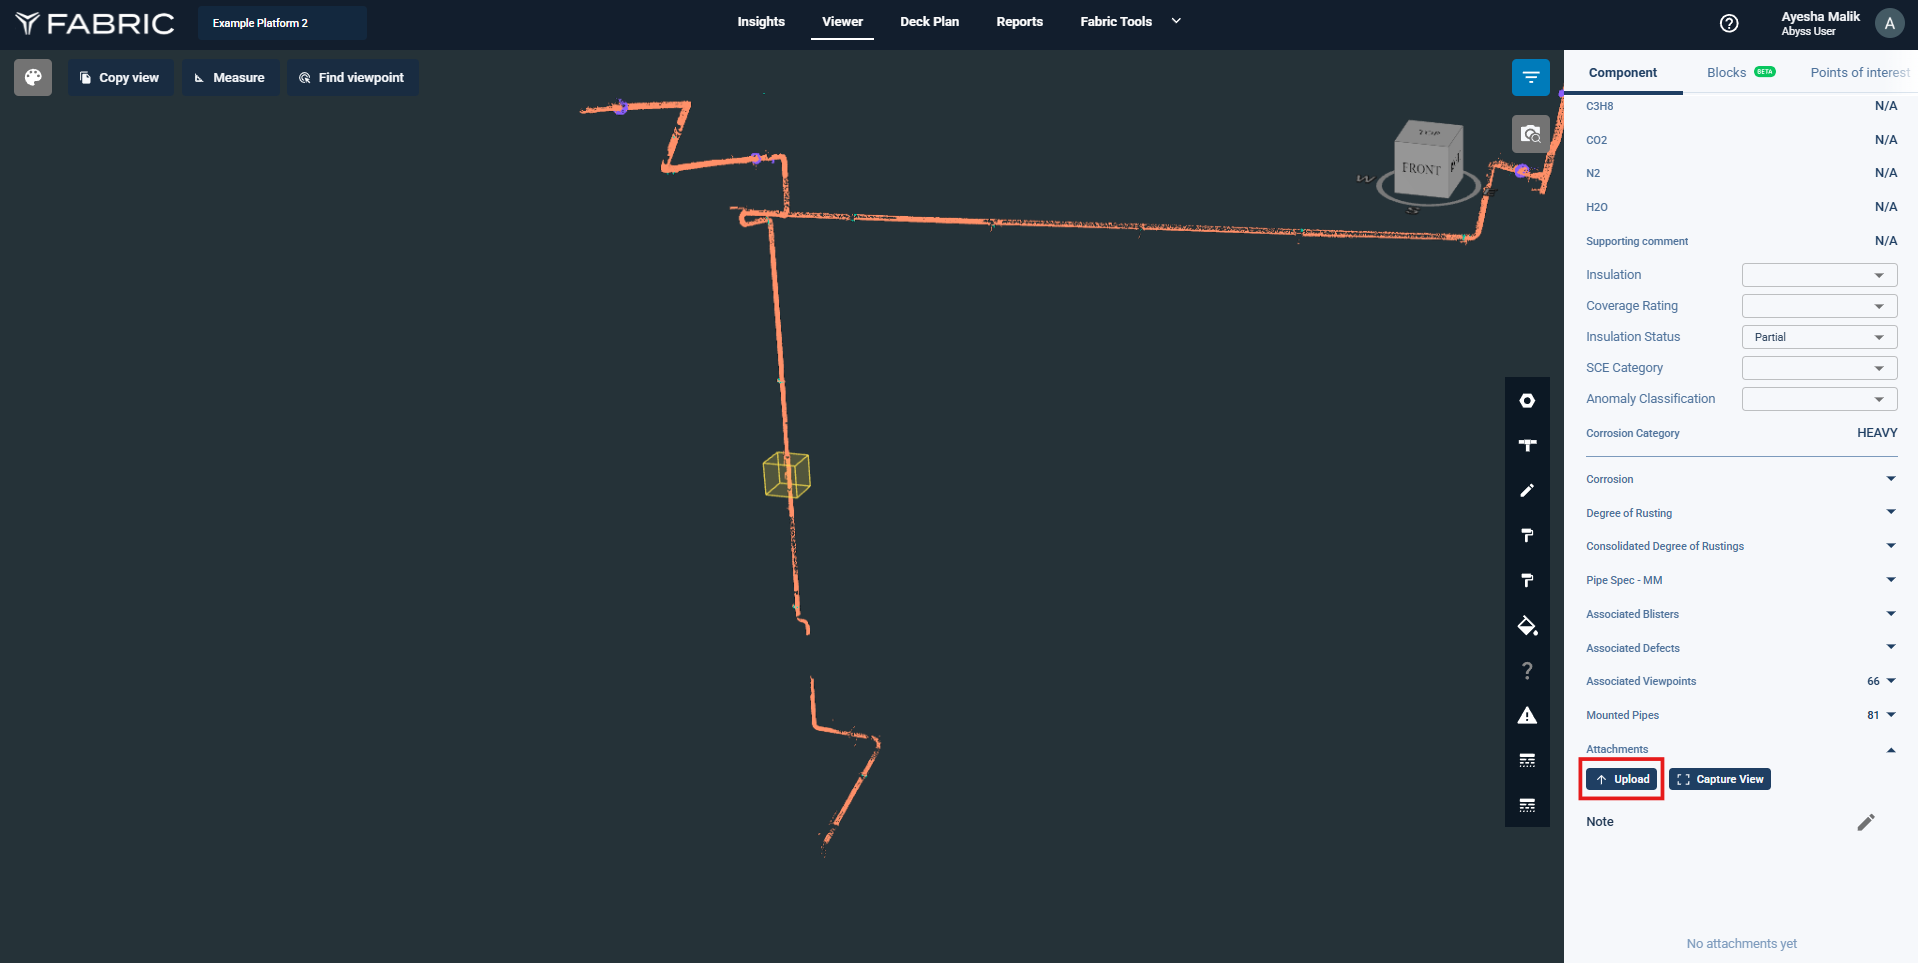
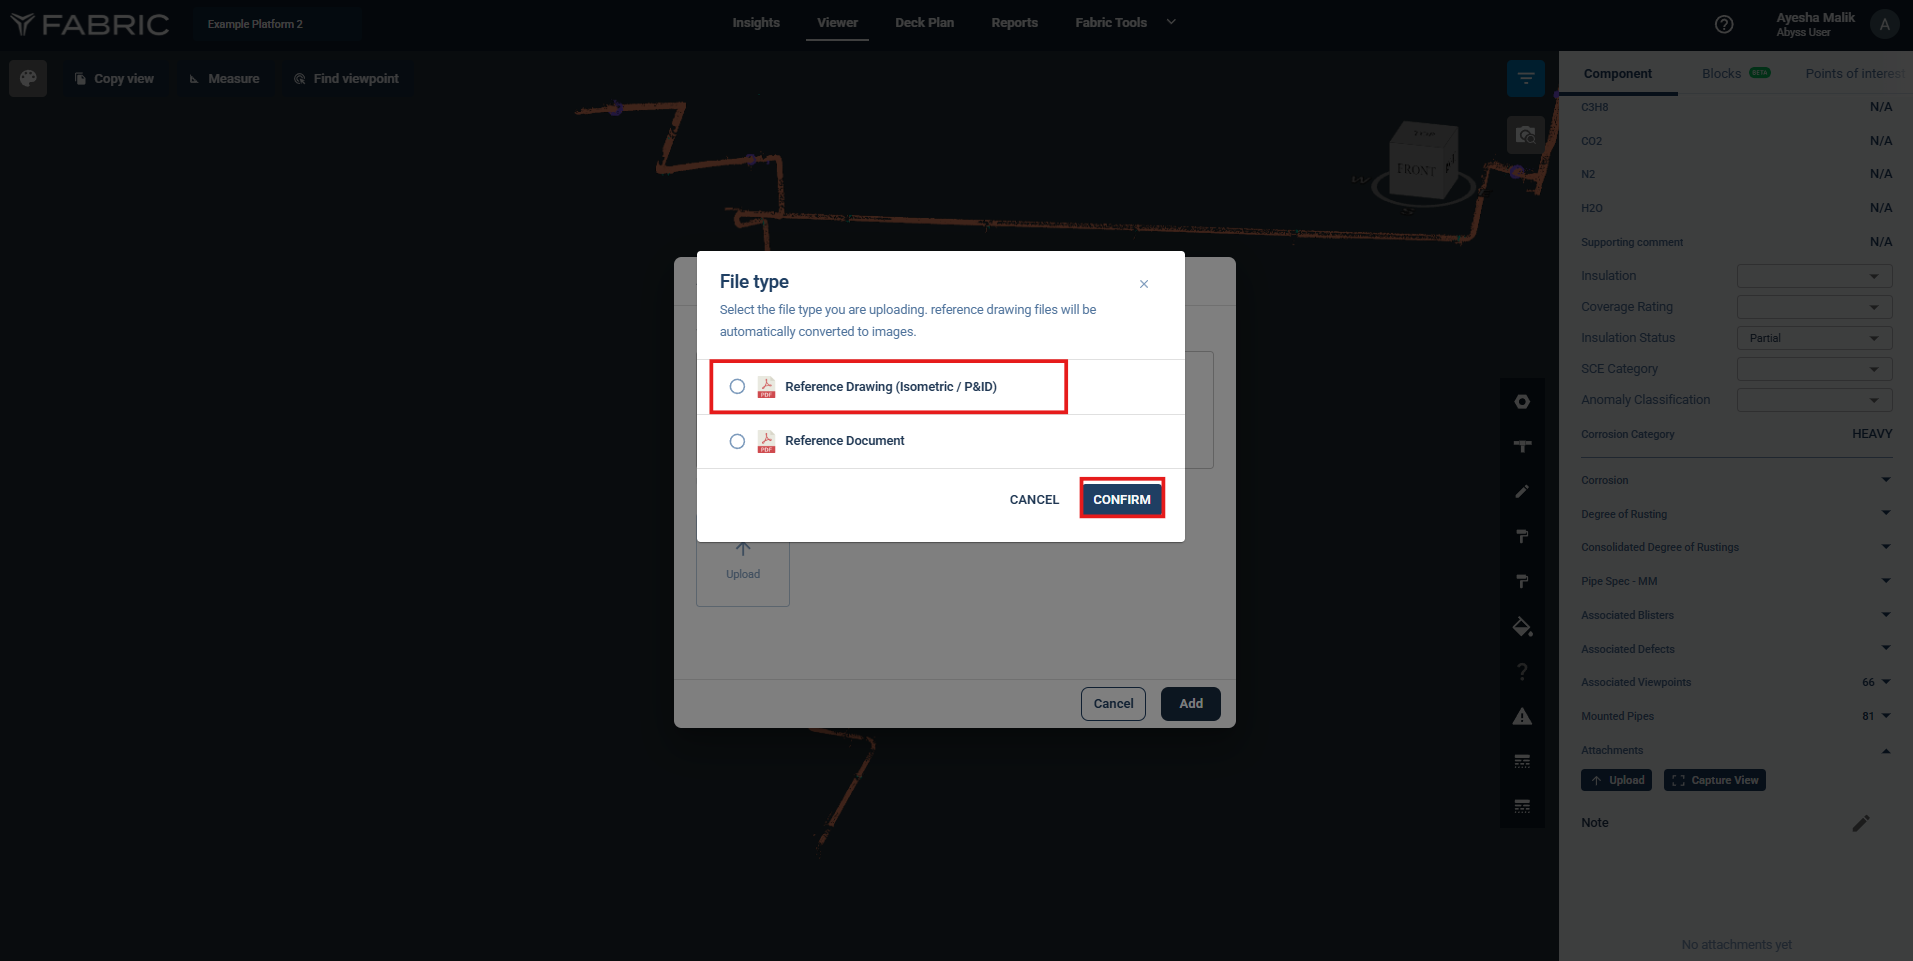
When prompted, click Reference Drawing.
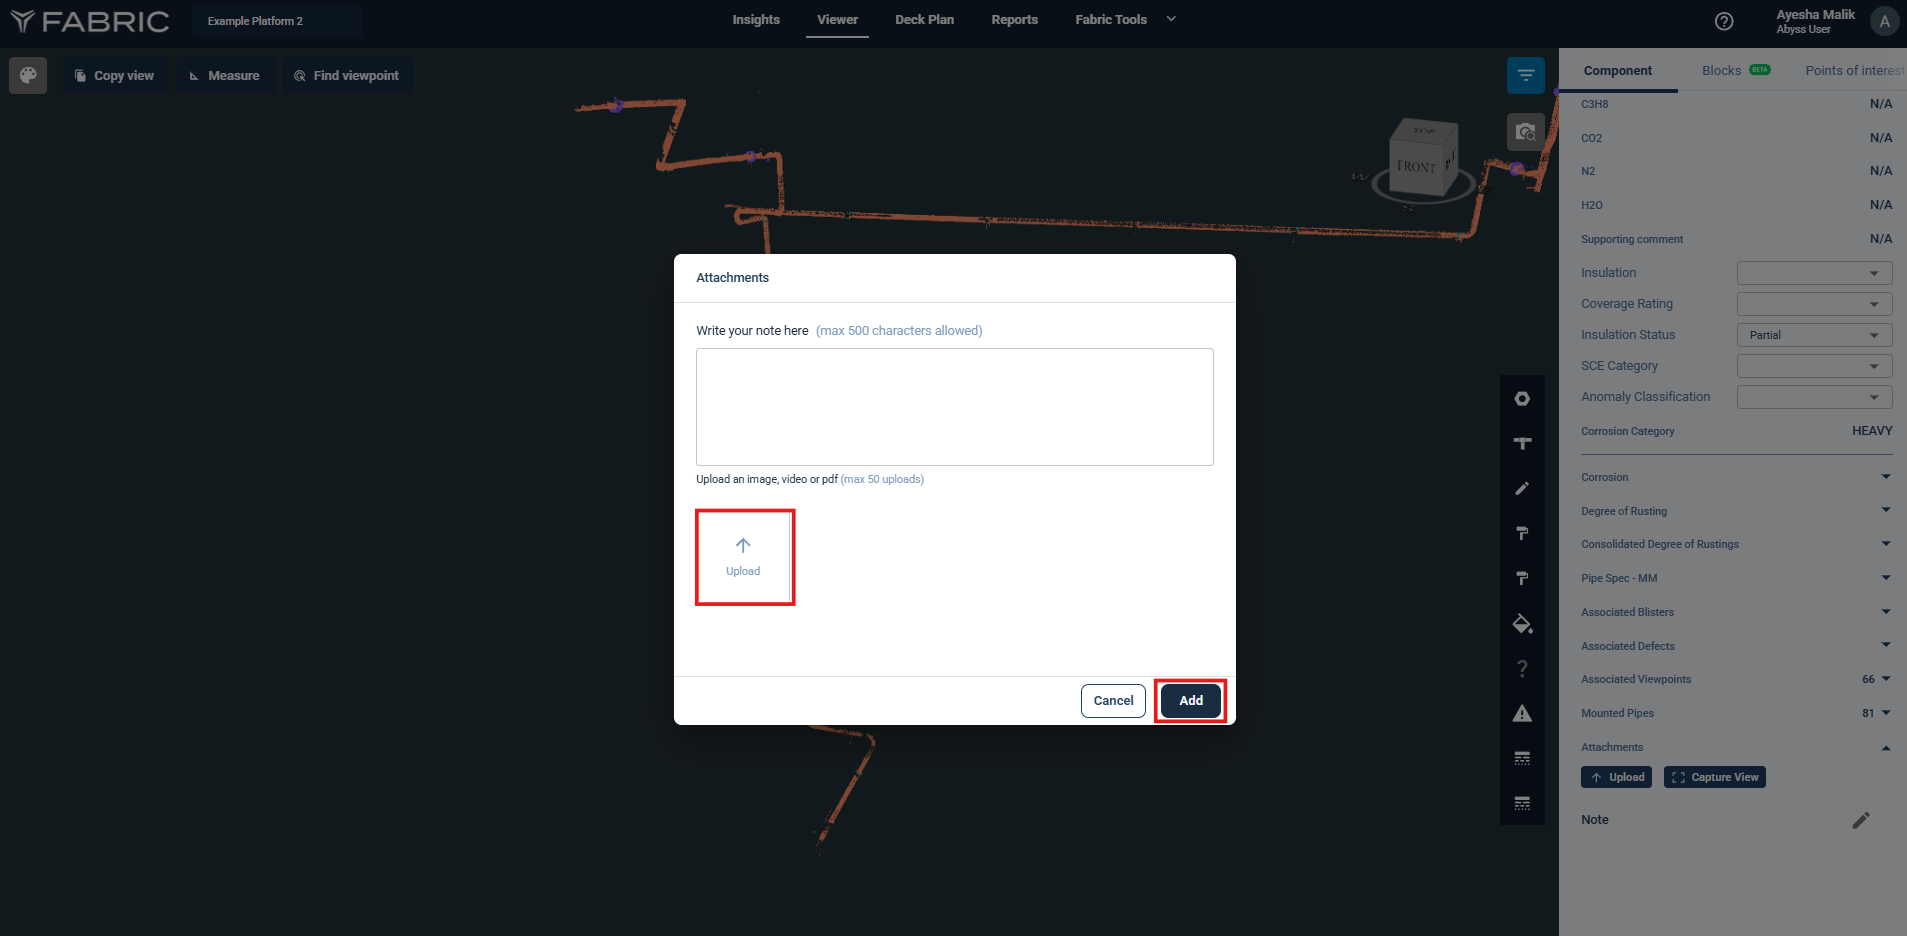
Click Confirm after selecting the files.
Click Add to save the files.
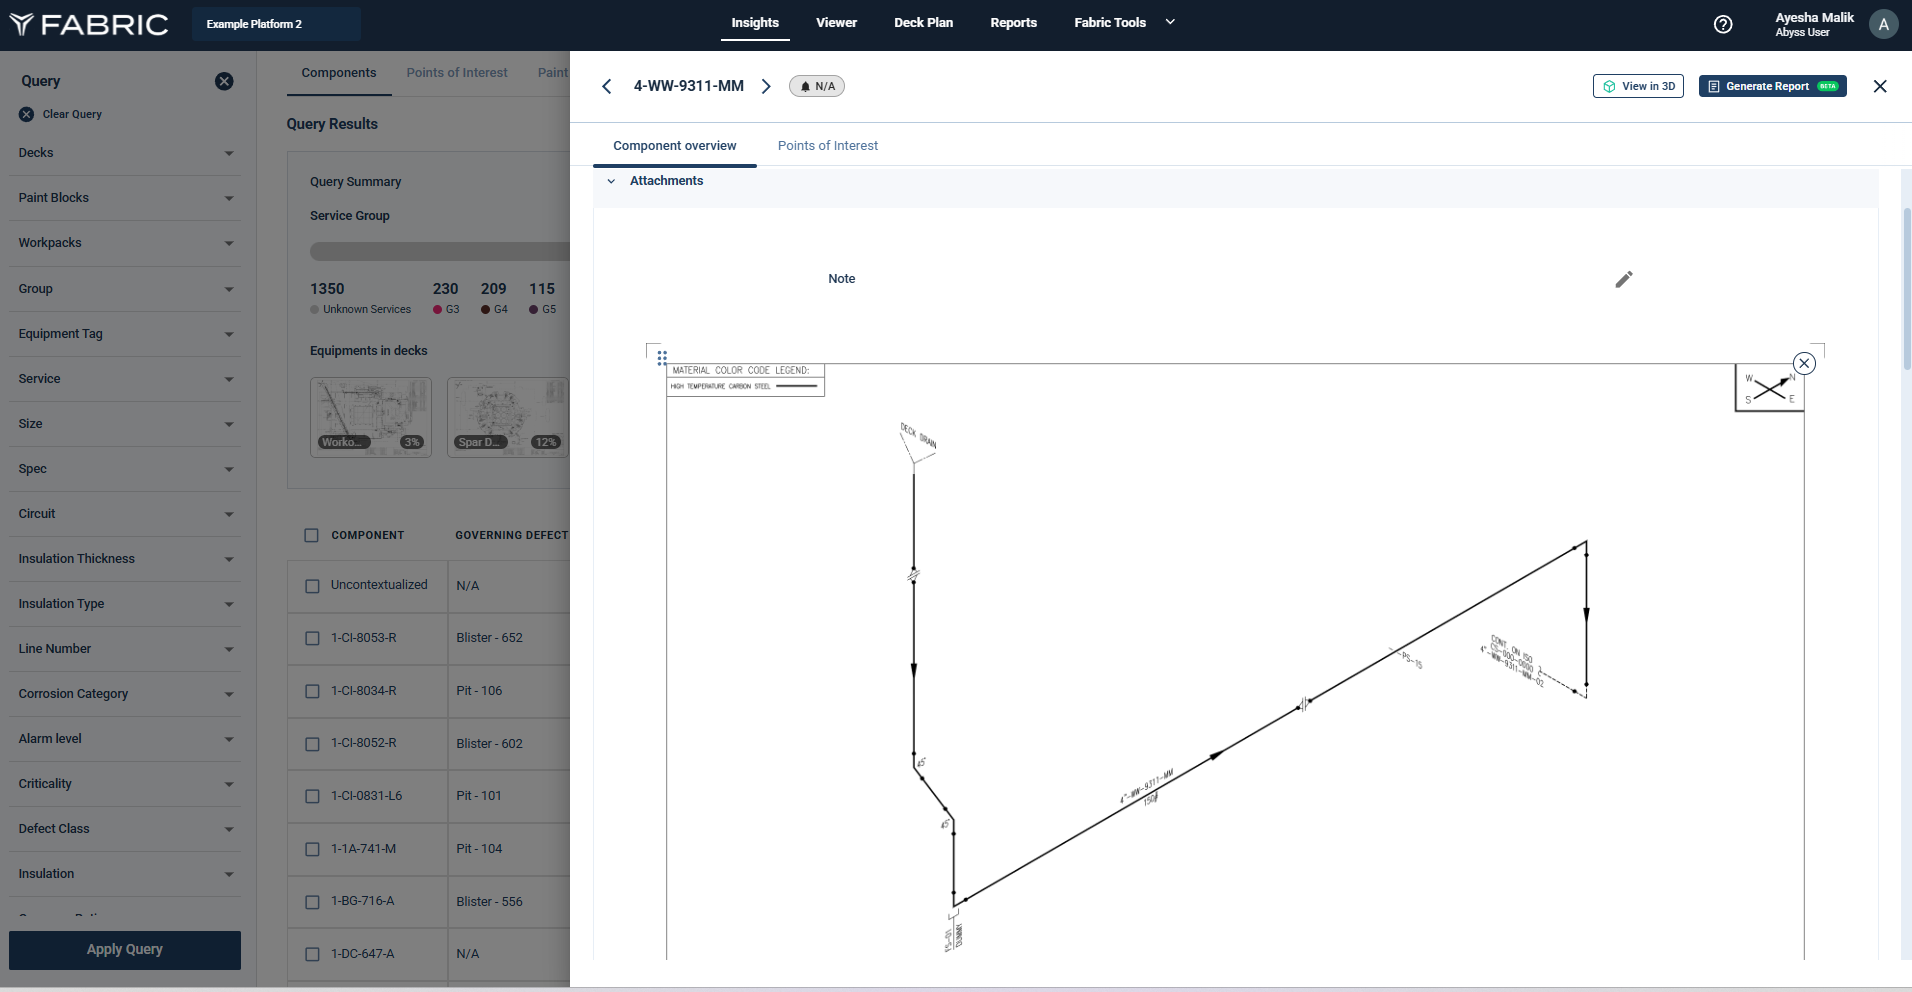
2. Access Isometric Attachments
The uploaded isometrics are saved and become available in the Component tab on the right-side panel of the viewer.
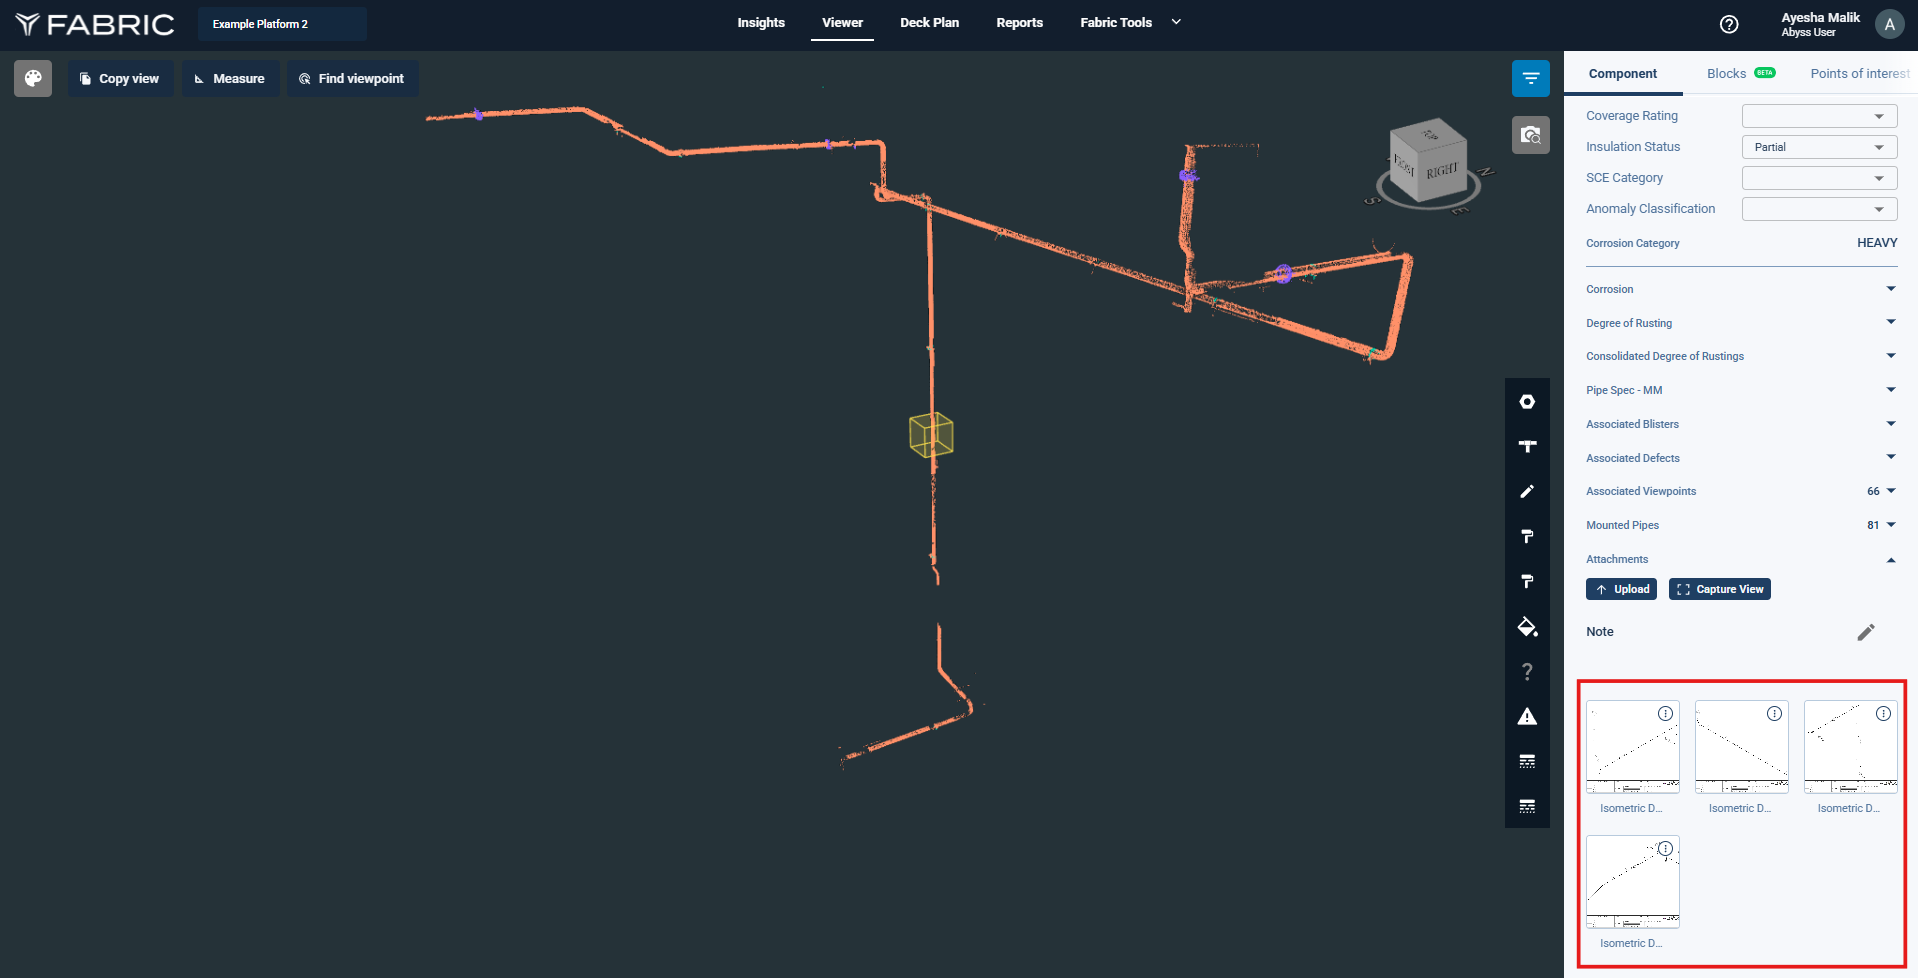
From this panel, multiple actions can be performed on the isometric.
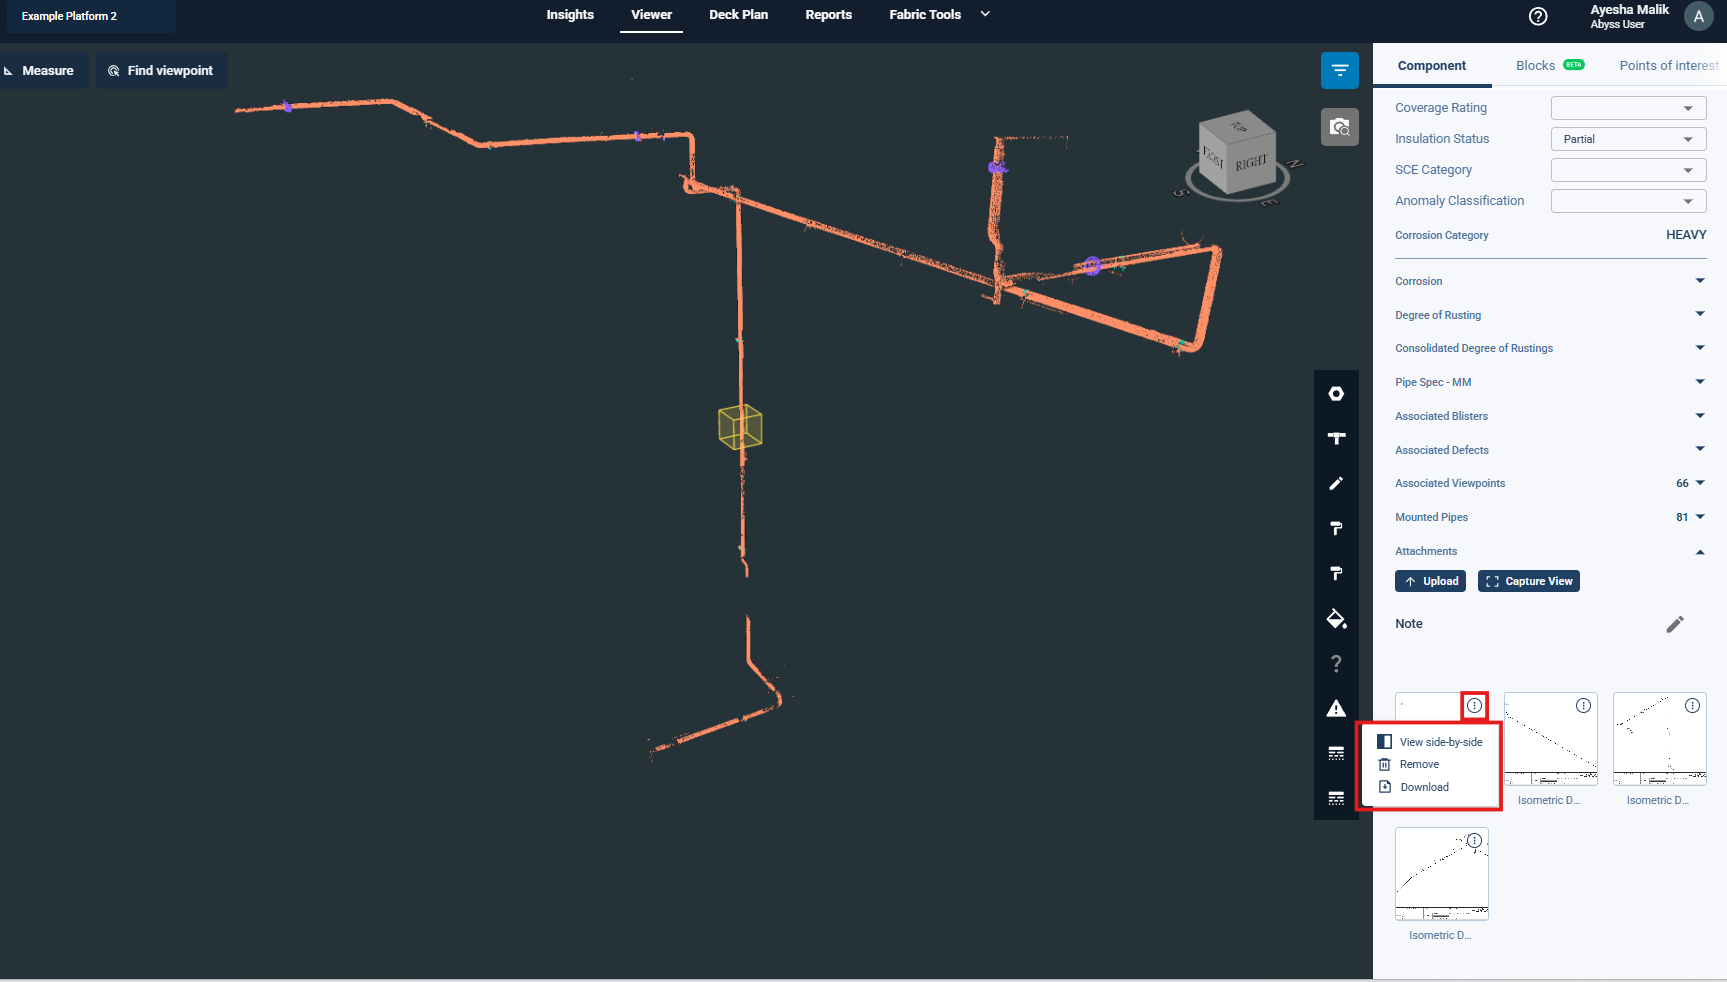
3. Available Actions on Isometric Attachments
For each uploaded isometric, click the three-dot menu to access:
View Side-by-Side – Opens the isometric next to the 3D model.
Remove – Deletes the isometric attachment.
Download – Downloads the isometric file locally.
Additionally, clicking directly on the isometric image opens it in full-screen view.
4. Use Side-by-Side View for Inspection
Click Three dots → View Side-by-Side.
The isometric drawing opens alongside the 3D model.
Use this view to:
Analyze anomalies shown on the isometric.
Compare drawing details with the 3D Viewer.
Add POIs or anomalies on the 3D Viewer based on on-field inspection findings or review observations.
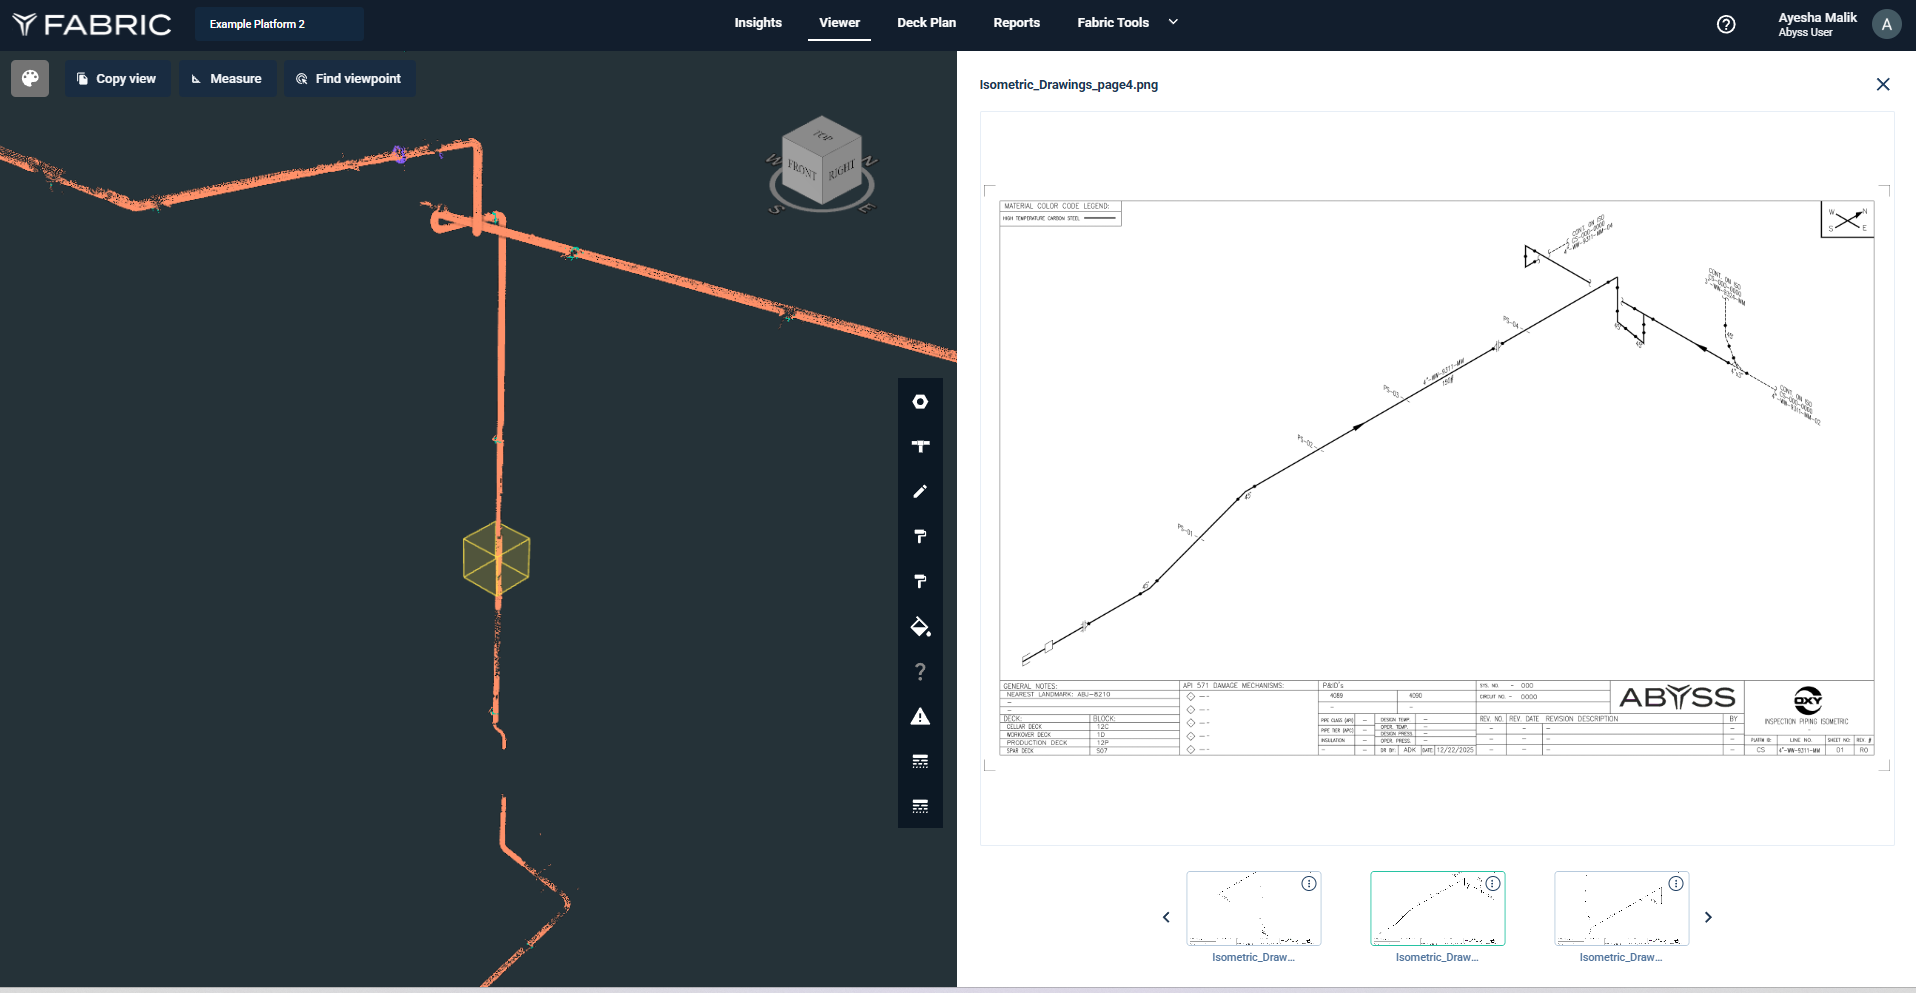
Side by Side View
5. Upload Isometrics from the Review Panel
Open the Review Panel (Insights).
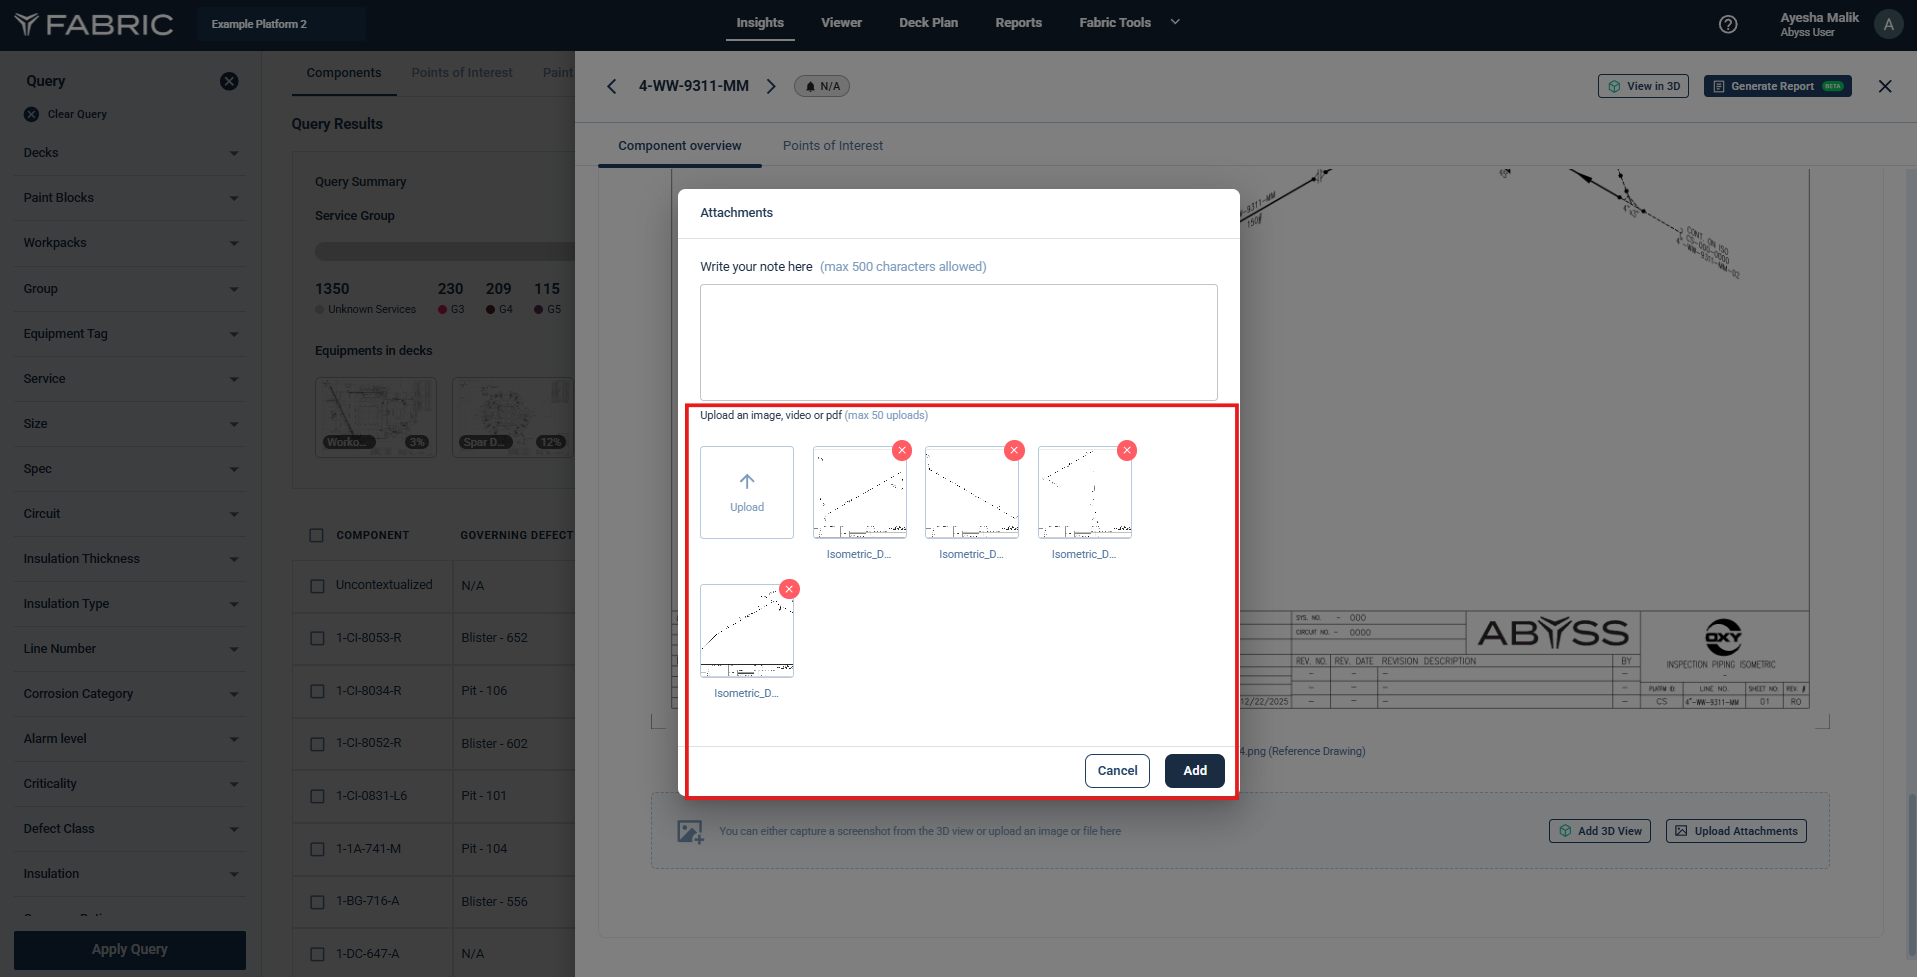
Click Upload Attachments.
Select the files.
Choose Reference Drawing.
Confirm and Add to save.
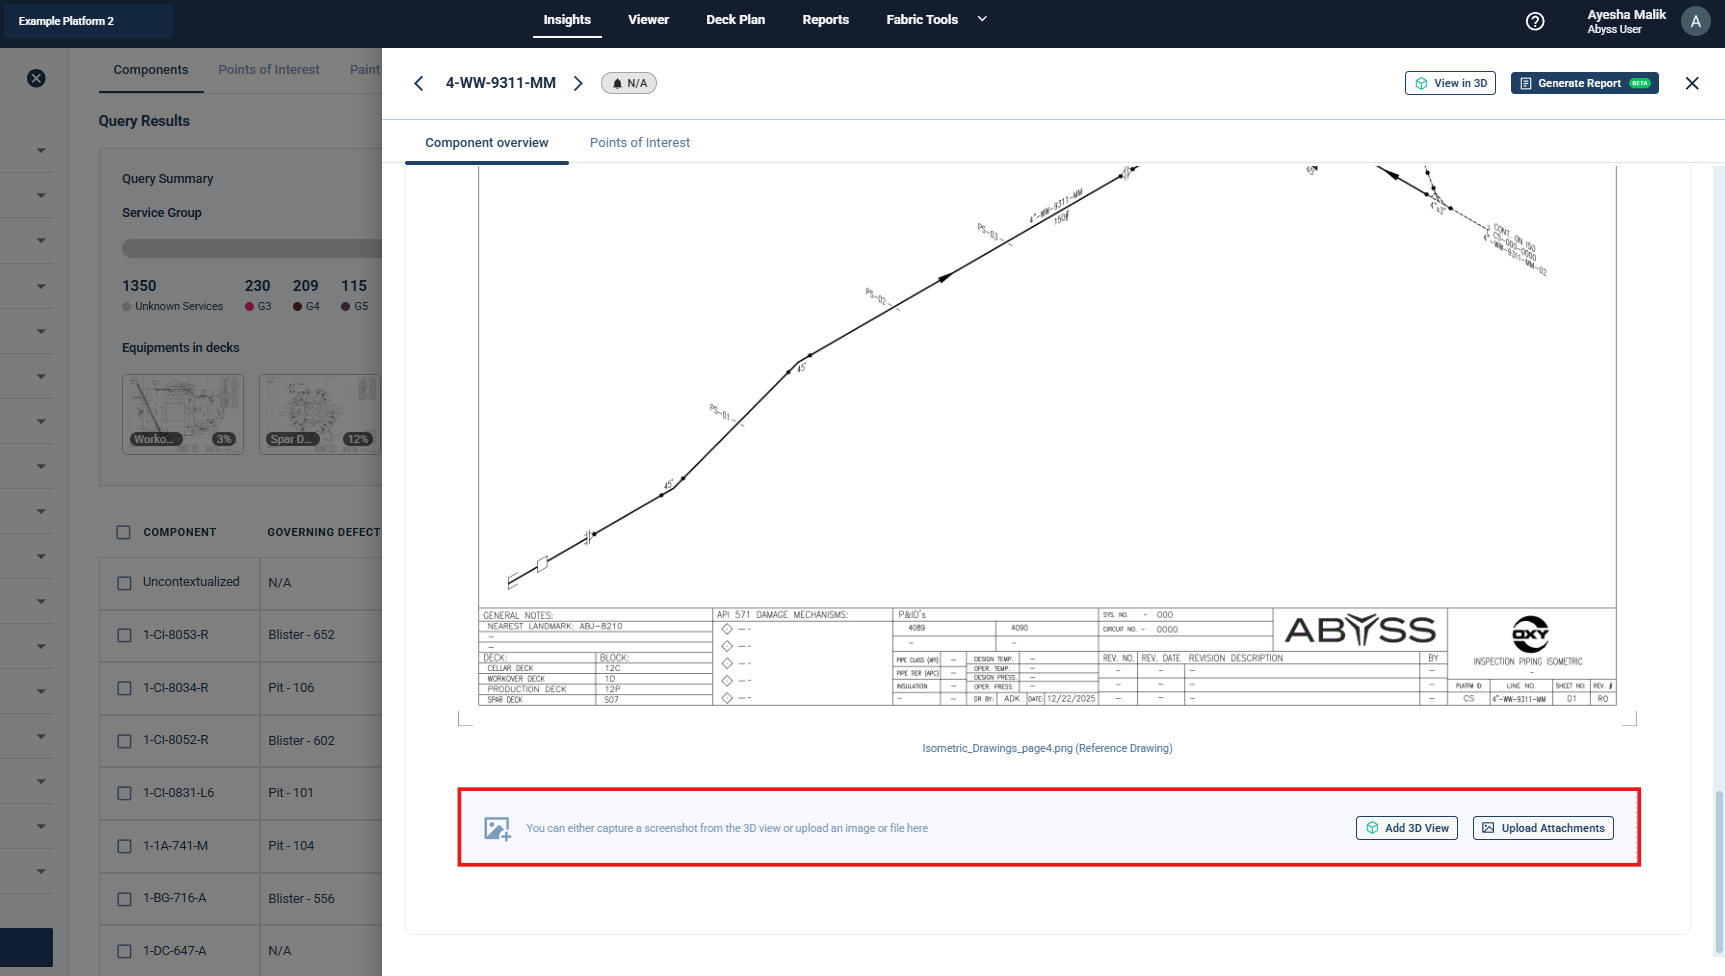
The uploaded isometrics will also appear in the component’s attachment list.
6. Availability in Reports
All uploaded isometric attachments are available in the Component Attachments section of the Component Report.
These are used by inspectors during on-field inspections and subsequent review processes.